Testing with models - part 1
From the Proafile Archives. Originally posted 1999
After the disastrous first sail of my 26’ proa Rozinante, and after waiting a suitable time for my emotional wounds to heal, I decided I needed to do some research and testing. Research was easy, since there is practically nothing out there to read on proa design. One notable exception is the Amateur Yacht Research Society (AYRS) which has published many a paper about proas over the years, and is one of the few yacht design organizations that treats proas as a legitimate area of interest. I became a member post haste.
The Book of Wisdom
One AYRS publication in particular; Design for Fast Sailing by Edmond Bruce and Harry Morss (AYRS 1970), I found to be brimming with useful and thought-provoking stuff. The book covers everything from basic sailing theory to the nuts and bolts of making performance measuring instrumentation (That part is a bit out of date). Chapter subjects include Designing for speed to Windward; Optimizing Sizes of Centerboards; Backyard Tank Testing; Sail Models; Hydrofoils for Anti-Heeling, Lift, and Steering; and one that especially caught my eye, Testing for Balance of Sailing Craft Using Small Models. The book is peppered with references to proas, and indeed, the ultimate yacht visualized in the last chapter turns out to be a proa.
Scale models, it turns out, sail exactly like the real thing! ...as long as you keep some important points in mind. They are excellent for fast and cheap testing of unusual concepts, in order to get a feeling if the basic idea has merit. Proa geometry is so poorly understood by Western naval architecture, that the gross arrangements of sail, hull, outrigger and leeway preventer are still wide open to debate, and experimentation. Models are useful for testing helm balance, trim, stability, and relative speed. Best of all, you can go through dozens of variations in less time and at a fraction of the cost of making the real thing.
You cannot scale up the model’s speed to full size with any degree of accuracy without lots of tedious math, but you can compare one model’s performance to another. Foil sections do not scale well, since Reynold’s Number effects dramatically change the properties of smaller vs. larger foils, rudders, hulls, and sails. Though foil sections will change with scale, their placement in the boat and their effects on trim and balance will remain the same.
Inspired by the AYRS, and the fact that my new guru, Edmond Bruce, thought very highly of using small models to test sailboat concepts, I got busy. I built a 1" = 1’-0" scale model of my 26’ proa out of balsa and foam, and laminated a layer of fiberglass over it using polyester resin, all materials purchased from the local hobby shop. It took me about a week of evenings to finish. Polyester resin really stinks up the apartment when it cures, so don’t use it. Later I found some epoxy resin suitable for laminating fiberglass, and used that instead.
My first model would test rig configurations. The current rig on Rozinante a Bolger proa rig, (see Figure 1) was an utter failure. I will leave the analysis of the Bolger rig for another time. After my disheartening experience with such an unconventional approach, I was in a much more conservative mood.
The Schooner
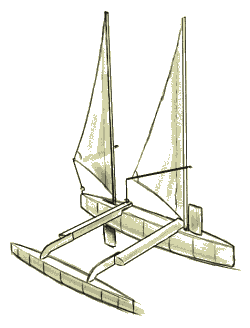
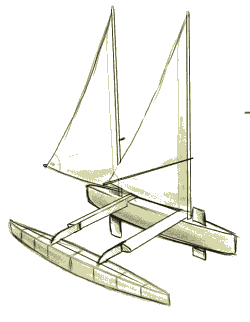
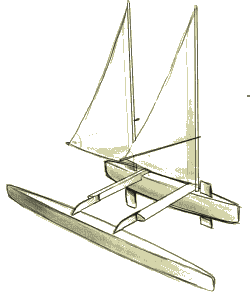
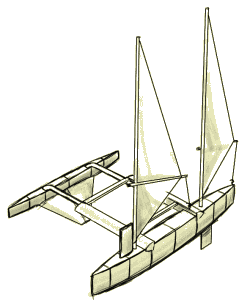
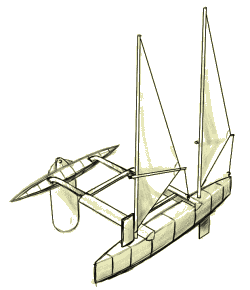
The first test rig was a cat-schooner, much like the rig on Cheers, Dick Newick’s famous racing Atlantic proa. I reasoned the schooner was a well understood rig, and wouldn’t hold any nasty surprises. The twin sails would lower the CE, so my proa wouldn’t be as tender. (The Bolger rig was far too tall, and the outrigger would fly too quickly and too unpredictably. The windward rake of the rig exacerbated this problem.) The twin sails would be light and easy to handle, and also, if the masts were designed to be freestanding, there would be no problems if the proa was caught-aback, since there would be no standing rigging to get in the way.
I made the rig in one afternoon, using lightweight spinnaker cloth (rip-stop nylon) for the sails, and wood dowels for the spars. I taped the sails together, making luff socks to go around the masts. I decided sprit booms would make the sails easy to trim, and indeed, the sails set and trimmed very well. I can see why sprit boomed sails are so popular on small boats. To steer, I wanted to try twin daggerboards, placed fore and aft in the hull. I would adjust the boards to move the CLR fore and aft , which would steer the boat. No radio-control was used, because a goal of my testing was to get the proa to self steer on most courses. A free sailing model would show whether or not this was possible.
My first tests were carried out from a friend’s dinghy, on a small lake. This was a bit unwieldy, since it is hard to row and catch a sailing model at the same time. Later, I found an ideal model test pond in a public park. It was not too obstructed by trees so the wind could reach it, and it was a uniform one and a half feet in depth, so I could wade after the model if it didn’t make it to the other side without capsizing.
I had to pull the forward daggerboard all the way up, and put the aft one all the way down, in order to get the model to sail straight and not luff up into the wind, because the schooner rig’s CE is considerably aft of the hull’s. In order to fall off the wind, I let out the aft sail a bit, and then it would balance on a reach. I noted that there was a slight but definite bow-down attitude with this rig, that grew more pronounced with more wind. I tried sailing the boat both as a Pacific proa, with ama to windward, and as an Atlantic proa, with ama to lee, since it was easy to switch with the cat-schooner rig. Predictably, the Pacific proa was faster in light winds, but was also considerably more tender, and thus susceptible to capsize. After a few near capsizes in the full-sized Rozinante, I was definitely looking for a more stable solution. I wanted to test the ama to lee Atlantic proa, since that configuration seemed to offer greater righting moment.
The Atlantic proa initially had better helm balance with this rig, since the drag of the leeward float tended to counteract the weather helm of the schooner rig. The bow daggerboard could be partially lowered to achieve a course steered to windward. I noted, however, that the helm balance changed depending upon wind strength and ama immersion, so the self steering was not very good. The boat would sail a meandering path across the pond, sometimes sailing so deep onto a broad reach that it would not come back to the intended close hauled course, and would get caught aback. Self steering was better with the ama to windward. My ama was only 20 inches long, compared to the 26 inch hull, so the bow down attitude was quite pronounced with the ama to lee while on a reach, and the boat would pitchpole easily if a stronger gust hit.
One course of sail that the schooner rig excelled at was dead down wind. I could adjust the sails to set wing & wing, and then fine tune them so that the boat self steered very well, adjusting to changes in wind direction with uncanny ability. I could picture hours of happy down wind sailing and surfing with this rig.
With the cat-schooner configuration, I seemed to have a choice. Sail with ama to windward and capsize in the puffs, or sail with ama to lee and pitchpole in the puffs. Hmmm. I decided a much longer ama might work, so I replaced the 20" ama with one 26" long - to match the hull. This worked somewhat better, but still, that pesky bow down attitude was there, so I knew that pitchpoling was just a matter of the right gust and the right wave.
The problem with a proa, when compared to a trimaran, is that the tri can place the buoyancy of the ama forward by making the bow much fuller than the stern, to counteract the diagonal downward pitching moment of the rig. The proa, by definition, must keep the center of buoyancy actually centered fore and aft, so it will not be as resistant to this diagonal pitching force. To make matters worse, tacking boats are designed with their CG aft, which again helps keep the bows up. Proas must have the CG in, you guessed it: the center. Crew weight shift aft can help, but of course my model has no crew.
Dynamic Lifting Ama
My next thought was if I can’t shift the buoyancy forward, maybe I could get some dynamic lift to occur at the bow of the ama, to compensate. I built a flat bottomed ama, 26" long, with some rocker built in. (see Figure 3) The idea was that the forward section of the ama would meet the water surface at a planing attitude, create dynamic lift to keep the bow up. It didn’t work very well, and the boat still pitchpoled too easily. The model never seemed to get up to planing speed before the lee bow went underwater!
Ama - XL
For my next act, I built a 32" ama, with a very high prismatic coefficient, and with enough buoyancy to support 200% of the boat displacement. This ama worked dramatically better, and the boat sailed practically level. Unfortunately, it would mean building an all new 32’ ama for the 26’ Rozinante, something I wasn’t too excited about. It appears that Atlantic proas need very long and slender lee hulls to work well, and that my little proa would quickly grow to over 30’ if I wanted a well performing one. This of course means more weight and drag as well.
What else had I learned? That proas were not such an easy nut to crack, that’s what. The longitudinal symmetry of the hulls means that a proa has to be long in relation to its sail’s CE to avoid sailing bow down. Much later, I realized that a proa is first and foremost a canoe. A long and lean minimum resistance sailing machine that does best without an overpowering sailplan. Modern racing multihulls are just about the opposite of this, with massive sail areas, ultra wide beam, and intense structural loads.
I had always thought that Dick Newick’s Cheers looked woefully under-canvassed to my eyes used to seeing much taller rigs on multihulls. Now I know that Cheers didn’t need more sail because it was incredibly long and light. Proas go after speed by reducing weight and drag, rather than by increasing sail area and power. Now, I think that a sailing sea kayak would be a better place to come from in getting to a proa, rather than a modern sailing multihull. Anyway, by now I had another cunning plan…
The Bruce Foilers
In Design for Fast Sailing, Edmond Bruce outlined his invention of an angled, surface-piercing hydrofoil to counteract the heeling moment from the rig. This amazing device has since been dubbed the ‘Bruce foil’ - in his honor. If I could get a Bruce foil to work on Rozinante, I wouldn’t need to build another ama, since the hydrofoil would be doing all the heavy lifting. I cut off the 30" ama, glued the 20" ama back on, and built a Bruce foil out of 3/16 plywood purchased from the hobby shop. Bruce specifies a 45 degree cant angle, a 1:1 aspect ratio, 0 angle of attack, and about a 1:10 foil area to sail area ratio. For my twin 150 sq. in. sails, that meant a foil of 30 sq. in. It looked huge! I glued the foil onto the ama, centered fore and aft, and went sailing.
It didn’t work, not even a little. Since, as you recall, the boat tends to sail bow down, The leeway angle was not enough to overcome the bow down angle, and the foil created negative lift. It acted like a shovel and instantly dug the ama under water, causing a pitchpole. It appears that the foil suffers from the same pitching moment that effects an ama. The solution with the ama was to make it long enough to effectively counter the moment. The solution with the foil was to position it forward of center. I cut off the 20’ ama, and replaced it with a square sectioned float, rotated at a 45 degree angle, to make a diamond. This gave me the flat mounting surfaces I needed for the 45 degree angled foil. I made an oval shaped foil, and mounted it with an adjustable screw so that it could swing back and forth, like a leeboard. I also made the crossbeam lengths adjustable, since Bruce said that the distance of the foil away from the rig center of effort was fairly critical for success.
Success
With the latest model, I headed back to the pond. It took a bit of doing to adjust the foil position correctly, but after I did, the little model sailed straight, fast, and stable. I swung the foil about 1" forward of center, and then put down about 1" of aft daggerboard. The forward board was not needed. This arrangement kept the bow up, and the boat sailed a straight line on a windward course. It was gratifying to see the hydrofoil lift higher out of the water with increasing wind and speed. With a sudden puff, I witnessed the little boat leap forward, the main hull barely touching the surface of the water. Wow! I was really on to something! This was by far the best performance I had yet achieved. The little boat was remarkably stable, even in very strong gusts. It appeared to be nearly uncapsizable, just like Bruce said, and converted all the heeling force to lift, which raised the entire craft more out of the water, thus reducing drag, and let it go even faster.
I experimented a bit with the distance of the ama/foil from the hull by adjusting the crossbeam lengths. Pushing the beams in, the foil would run deeper and deeper, until it couldn’t lift the ama out of the water. Pulling the beams out, the foil would ride higher, until it was barely in the water, however then the boat would make too much leeway. It appeared that Edmond Bruce was correct, and the beam of the foil stabilized proa is an important number to get right.
I enjoyed many trips to the pond with this model, watching it perform. The speed was thrilling, but gradually I discovered some negative traits:
- Sailing the boat on a broad reach was a bit dicey. Pitchpoles sometimes happened. I surmised this was because the sail’s resultant was moving further forward as the sail was let out.
- In puffs, the Bruce foil would raise up out of the water. This is what it was supposed to do, but since the foil was angled forward, as it did so the effective CLR moved forward, which affected steering in a big way. The boat would weave its way along, heading off in the puffs, and then heading back up in the lulls. A good helmsman could adjust for this of course, but my model had no helmsman.
- I also noticed that until the wind was strong enough to create the speed needed to get the ama flying, the boat was actually pretty slow, having a huge foil to drag through the water, with lots of skin friction. This problem was solvable with some sort of foil retracting mechanism. Foil retraction would be needed anyway for beaching and trailering.
- If I trimmed the aft sail in to create the most power, it seemed that the stern wanted to lift more quickly, and the model would sail bow down. I learned to under trim the aft sail to get the model to sail with a more level attitude. I was trading off power for control.
The Tacking Test
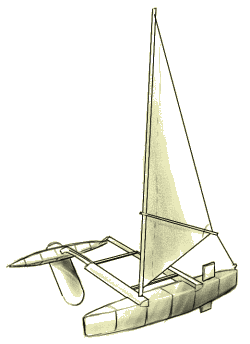
As a quick test, I removed the schooner rig, and built a cat rig (one sail) of the same total area in its place, with the mast stepped on the forward crossbeam. I knew this arrangement would be impossible to shunt, but I wanted to see what would happen. With the foil adjusted so it was even with the forward crossbeam, the boat had the best performance yet. The foil actually lifted the bow of the boat, so that only the aft sections were immersed. The boat sailed slightly bow up, not down, and pitchpoling never happened. The boat was amazingly stable, and even gusts of over 12 knots would not capsize it. It just sailed even faster.
The downside was the other tack. If the boat could not be shunted, then it must tack, which meant the hydrofoil would be on the windward side. I could never get this to work reliably. The boat would start sailing along, with the foil pulling down, not up. This kept the boat upright, for a while. But invariably, a sudden gust would lift the foil out of the water, and over she would go. Obviously, the tacking Bruce foiler was impractical, but why did the longitudinally asymmetrical foiler outperform the symmetrical one with the foil to lee"?
My theory is that it all comes down to the center of gravity. When a Bruce foil is powered up, the foil is exactly counterbalancing the capsizing force of the sail. The foil is doing most of the work, resisting leeway, and creating lift. The main hull is mostly just along for the ride. The hull’s main function at this point is to control pitching and yawing forces, which helps the foil run smoothly. If the foil is parallel, or nearly so to the longitudinal CG as it is in a proa, then the forward pitching moment of the sail will cause the boat to sail slightly bow down, and especially on leeward courses, that can invite a pitchpole. If the sail is well forward and the CG aft, as in a tacking boat, then there is plenty of weight aft to keep the bow up, which keeps the foil well away from any dangerous negative angle of attack. Think of the hull like a teeter-totter, with the pivot being the Bruce foil. Move the pivot off center, and the teeter-totter will no longer teeter, but quickly find its most stable position with the long end firmly on the ground. The tacking foiler is analogous to the off center teeter-totter, with the stern being the long end.
It appeared that major longitudinal adjustment of the foil, and probably of the rig, would be needed to make the Bruce foiled Atlantic proa reliable. I sketched lots of variable geometry schemes with this in mind, and built several models of these. In the end I decided that all the work needed to make the boat sail reliably as a Bruce foiler just wasn’t worth it. It would have required new, longer cross beams, probably a new ama, a fore and aft foil sliding mechanism as well as one for retraction, and a new rig concept as well, one that would put the CE further forward, perhaps a balestron rig.
What I needed for a foiler was a little 16’ test bed, not a 26’ boat that was already built. I reluctantly put away the Bruce foil models, (thinking that some day I would return to these fascinating foils) and went back to the drawing board. How was I going to make Rozinante sail properly without completely rebuilding her?
